Scanning Slides using the Polaroid SprintScan 35

Denise Lim
University of Georgia
20 November 2002

Discover Life | Education | Training Guides | Scanning Slides
Overview

All slides in the lab are scanned with the Polaroid SprintScan 35 using Adobe Photoshop. Slides are then cropped and fixed up also using Adobe Photoshop 5.0.

Index

Starting

  • The on/off switch for the SprintScan 35 is on the back left of the machine.
    (Before turning the scanner on/off, please make sure the computer is SHUT DOWN and turned OFF!!!)
  • Open Adobe Photoshop 5.0
  • Go to File, then Import, and finally SprintScan 35...
    two separate boxes should appear, one named "SprintScan 35" and the other "Preview".

Index

Inserting Slides

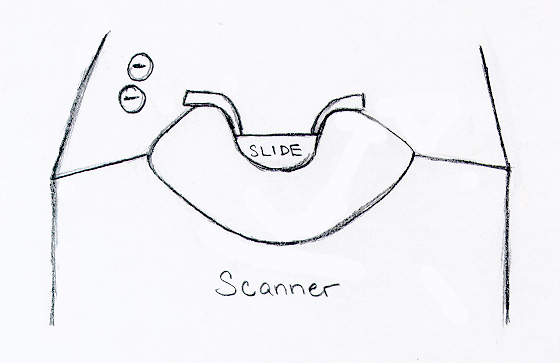
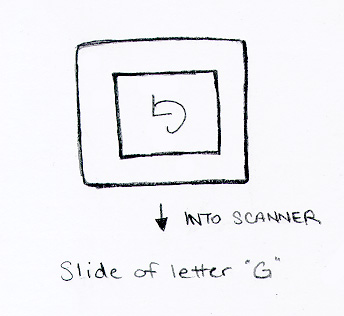
  • Insert slides upside down facing forward. Be sure to push slide all the way down. (See images below.)

Index

Previewing and Scanning Slides

  • In the box named "SprintScan 35", make sure the settings are as follows:

      Film: Color Slide
      Type: Color
      View: Super Slide
      Resolution: 2700 dpi
      Scale To: 100.00%

    (These settings should be the default so you should not have to change anything.)

  • After making sure the setting is correct, click Preview and the image should appear in the second box named "Preview".
  • Click once in the box named "Preview" and use the cropping tool to select the entire image.

    (It doesn't matter if the image is crooked. That can be fixed later after scanning.)

  • After cropping the image, click once into the other box (SprintScan 35) and then again on Scan. The two boxes should now disappear and a new box will come up with the image in it.
Index

Saving and Naming Images

  • Go to File and then Save As...
  • Images are usually saved to a temporaray folder on the desktop and then transferred over to the appropriate directory. Click on Desktop and then double click on the folder you would like to save it to.
  • Type in the name of the file. Images are named using the slide identification number, the name of what the image is, the resolution, and then jpg. Everything is separated by a period (.) and each file's name should have no more than three (3) periods(.) in it. If the name of the image contains more than one word, it should be separated by underscores (_).

    (example: 03.blue_bird.2700.jpg)

  • Make sure the file format is JPEG and click Save.

Index

Transferring Images To A Directory

Files are transferred over to their appropriate directory using NiftyTelnet.
  • Open NiftyTelnet
  • Go to File, and New Connection... and a New Connection box should open up.

    (The Hostname should be dial.pick.uga.edu.)

  • Click on Scp....
  • A new box should appear. Click Add File/Folder... and choose the appropriate file or folder that you would like transferred over. Then, click Select "File/FolderName", which is located towards the bottom.
  • For Destination Path, type: /home/web/dl/im/DirectoryName
  • The File Translation should be Binary Mode
  • Click Start Copy and when prompted to, enter the user name and password.
  • Check to make sure everything that needs to be transferred has transferred over by going into the directory and listing everything.
  • Delete the files/folder from the Desktop (only if you're sure the files have transfered over.

Discover Life | Education | Training Guides | Scanning Slides Commands

Last updated: 20 November, 2002